Solving Large Photo File Copying on Mac with ForkLift
Photo Copying Too Slow with Finder
Not long ago, I needed to transfer over 1000 photo files from my iPhone to an external disk. At first, I used Finder, the default file explorer on Mac, but the copying speed was much slower than I expected, which was frustrating. It seems that because there were so many small files, Finder was doing things in the background like scanning files or Spotlight indexing before copying. These processes were the main culprits for the slow speed.
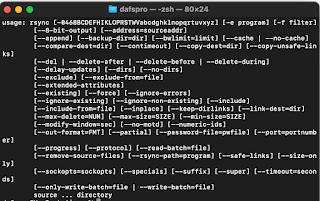
So, I started looking for alternatives. I tried using the `rsync` command in the terminal, and the speed was definitely faster. But having to type commands every time was cumbersome, and I was worried that a mistake would cause the copy to fail. So, I decided to compare file explorer apps to find a more convenient and faster method.
Why I Chose ForkLift
After reviewing several apps, I decided to choose ForkLift . ForkLift provides a dual-pane interface, making file copying intuitive and fast. It's known to be particularly fast when handling large numbers of files. The biggest advantage was that the free version could do everything I needed.
The difference between the paid and free versions of ForkLift mainly lies in cloud service integration and advanced features (e.g., synchronization, advanced search). But for simply copying a large number of files, the free version was sufficient.
Why ForkLift is Faster
The reason why ForkLift is faster than Finder is that it minimizes unnecessary operations during the file copy process. While Finder performs several tasks like Spotlight indexing or checking file status before copying, ForkLift skips these processes and focuses solely on data transfer. This makes it much faster even when handling a large number of small files.
In my tests, a task that took more than 30 minutes in Finder was completed in less than half the time with ForkLift. It was also very stable, and it didn't stop or encounter any errors.
Terminal vs ForkLift
Of course, using commands like `rsync` in the terminal can be similar or even faster in terms of speed. However, the terminal has a high barrier to entry for those who are not familiar with it, and there's a risk of data loss if you accidentally type the wrong path. On the other hand, ForkLift is easy for anyone to use thanks to its intuitive UI, and it is much more convenient with the ability to visually track the progress.
How to Install and Use ForkLift
You can download ForkLift for free from the official website. After installation, you can copy large files with the following simple steps:
- Run ForkLift, and set the source folder (e.g., iPhone photos folder) in the left panel, and the destination folder (e.g., external disk) in the right panel.
- Select the files you want to copy and drag and drop them, or click the "Copy" button in the top menu.
-
The progress can be checked in real-time on the status bar at the bottom.
Additional Tips!
ForkLift not only provides simple file copying but also provides FTP/SFTP client functionality, making it useful for server management. Also, thanks to the dual-pane interface, you can easily compare and synchronize files between two locations.
In Conclusion...
If you've been frustrated with the limitations of Finder, ForkLift is a really good alternative. I would especially recommend it if you need to handle large amounts of data like me. It provides powerful features even in the free version, so give it a try! You can also experience faster and more efficient file copying on your Mac.


