Installing and Running MotionPhoto2 on macOS: Starting Your Motion Photo Creation
What is MotionPhoto2?
MotionPhoto2 is a tool that converts Live Photos taken on Apple iPhones into Google Motion Photos. To back up iPhone Live Photos to Google Photos (on devices other than an iPhone), it's necessary to convert them to the Motion Photo image type. This project, written in Python, helps you create Motion Photos by combining images and videos. In this post, I will guide you step by step on how to install and run MotionPhoto2 on a Mac.
1. Download MotionPhoto2 Source Code
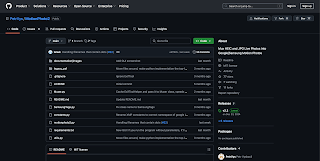
First, you need to download the source code for MotionPhoto2. Go to the project page through the GitHub link below: MotionPhoto2 GitHub Page
On the GitHub page, click the green "Code" button in the upper right corner and select "Download ZIP" to download the entire source code of the project as a ZIP file.
2. Unzip and Move the Folder
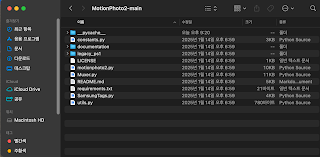
Unzip the downloaded ZIP file to your desired location. In this guide, we will assume that you have unzipped the file to the `/Users/dafspro/Documents/` path, creating the `/Users/dafspro/Documents/MotionPhoto2-main` folder. Unzip it to your desired location and remember that path.
3. Check Python Installation (and Install if Necessary)
Since MotionPhoto2 is written in Python, Python must be installed on your Mac. Open a terminal and enter the following command to check for Python 3:
python3 --version
If Python 3 is not installed, or a specific version is needed for MotionPhoto2, you can download and install the latest version from python.org or install using Homebrew:
brew install python@3.94. Set Up a Virtual Environment
A virtual environment creates an independent Python environment for each project, preventing conflicts between packages and making dependency management easier. Here's how to set up a virtual environment for MotionPhoto2:
- Go to the project folder in the terminal:
cd /Users/dafspro/Documents/MotionPhoto2-main - Create a virtual environment:
python3 -m venv .venv - Activate the virtual environment:
Once activated, (.venv) will appear in front of the terminal prompt.source .venv/bin/activate
5. Install Required Packages
A few additional packages are required for MotionPhoto2 to work properly. Run the following command within the activated virtual environment to install the required packages:
pip install -r requirements.txt6. Install ExifTool
MotionPhoto2 uses ExifTool to process image metadata. You can install ExifTool using Homebrew:
brew install exiftool7. Run MotionPhoto2
Once all installations are complete, run MotionPhoto2 using the following command (the virtual environment must be activated):
python motionphoto2.py8. Deactivate the Virtual Environment (Optional)
When you're done using MotionPhoto2, you can deactivate the virtual environment with the following command:
deactivateIn Conclusion...
Now, MotionPhoto2 is running with a GUI on your Mac. However, in the code you receive from github, the text is white, so there is an issue with visibility. (It seems to be a dark mode issue on macOS).
If you have any questions or problems, please leave a comment! I hope you have a pleasant experience making motion photos.


