Replacing a 13-inch MacBook Air M2 Bezel: My DIY Repair Experience
A Crack Caused by Carelessness, I Decided to Fix it Myself
While using my 13-inch MacBook Air M2 (A2681), I accidentally closed the top panel while a USB cable was still connected, and a crack appeared in the display bezel. Fortunately, there was no problem with the display itself, but I decided to replace the broken part of the bezel because it was an eyesore. After researching how to replace it using Reddit, Instagram , and YouTube, I ordered parts from AliExpress for about 6,000 KRW. I felt confident that it was something I could do myself.
Bezel Structure and Preparation Process
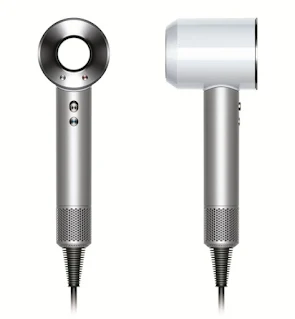
The MacBook Air's bezel was made of plastic and was fixed with double-sided tape to cover the cable and sensors of the lower part of the display panel. To remove this adhesive, I needed to weaken it with heat. Here, I started to have my first concern. Which method is more suitable, a Dyson hairdryer or a hot pack? After reviewing several resources, I chose the Dyson hairdryer. It seemed that I would have higher work efficiency as I could control the temperature and airflow.
However, it was important to protect the screen or keyboard with a towel or cloth as heat can directly damage them. I covered the screen with a towel and then used the Dyson hairdryer.
Choosing a Tool to Create Gaps
After weakening the adhesive, I had to create gaps, and I had a lot of concerns here too. Since I didn't have safe tools like an iFixit opening tool or plastic card, I had to find alternatives. In the end, I used the end of a nutrition drink that you suck up with a straw , and the material was thin, hard, yet soft enough to be perfect for the job.
Starting from the cracked area, I inserted the end of the nutritional drink to create gaps, and I removed the adhesive by briefly using the Dyson hairdryer. I set the Dyson to temperature level 2 (indicated by two flame icons) and used it briefly for around 15 seconds at a time. After applying heat, the adhesive peeled off much easier.
Points to Note During the Work
During the work, a lot of microplastics flew off from the broken bezel pieces. It was good to work in a safe place and then shake the device outside to get rid of any remaining pieces. I shook off all the remaining plastic pieces outdoors.
Another important point is the duration of heat usage . If you apply heat for too long, it may affect the LCD or internal components, so it's important to work briefly and concisely. I applied heat for 15 seconds at a time.
Attaching the New Bezel: Simple but Carefully!
After completely removing the old bezel, the process of removing the double-sided tape of the new bezel and attaching it was relatively simple. The new part was already shaped, so centering it wasn't difficult. I slowly pressed it down from the center to fix it. The whole process took about 10 minutes.
Points I Considered with GPT
During the work, I discussed several things with GPT and found solutions:
        Q:

    Which is more suitable, a Dyson hairdryer or a hot pack?

        A:

    A Dyson hairdryer is more efficient because it allows temperature and airflow control.

        Q:

    What should I use as a tool to create gaps?

        A:

    A plastic spudger or card are ideal. If you don't have them, use a soft and rigid alternative tool.

        Q:

    How to remove the adhesive more easily?

        A:

    Use a small amount of contact cleaner like BW-100 or use heat in conjunction with it.
Thanks to GPT's answers, I was able to clarify my approach and calmly cope with unexpected problems.
In Conclusion...
This MacBook Air M2 bezel replacement was a simpler yet more interesting experience than I thought. With the right tools and methods, it can be solved with DIY. Especially, the fact that I could clearly solve the issues I was concerned about with the help of AI like GPT was truly amazing.
If you have a similar problem, try finding a solution with AI! And above all, don't forget to be safe and careful during the work. 😊


